ACT365 is a cloud-based access control platform that helps ensure only authorised users can access your facilities. Integrating ACT365 with Ronspot enables seamless synchronisation between your booking system and your physical access control.
Prerequisites
Before integrating Ronspot with ACT365, you will need:
-
An active ACT365 account and subscription
-
A configured ACT365 controller
-
The username and password for your ACT365 account
These ACT365 credentials will be entered into the Ronspot integration settings as outlined below.
Step 1: Log in to Ronspot admin panel
- Sign in to your Ronspot admin panel using your administrator credentials.
Step 2: Navigate to Account > Integrations
- In the left-hand menu, go to
Account > Integrations
Step 3: Add a new integration
- Click
Add integrationbutton at the top of the screen. - In the pop-up window, choose
ACT365from the list of available integrations.
Step 4: Configure the ACT365 integration
-
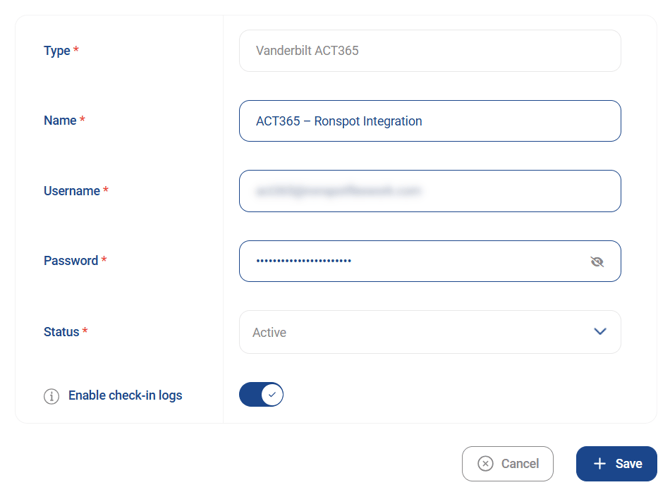
On the configuration screen, enter the following details:
-
Name: Enter a name for the integration (e.g., ACT365 – Ronspot Integration)
-
Username: The email address used to sign in to your ACT365 account
-
Password: The password for your ACT365 account
-
Status: Set the status to
Active. - Enable check-in logs: Activate the toggle to retrieve data from ACT365 (used to populate Ronspot reports).
-
- Press
Save
Note: If you do not have these credentials, please contact your ACT365 partner installer. They can create or provide the required login details.
Step 5: Associate your Ronspot zones
You can now connect specific Ronspot zones to your ACT365 account. This allows you to choose which zones require ACT365 access control.
- In the list of integrations, locate the ACT365 integration you just created.
- Click the camera icon in the
Actionscolumn to manage zone associations.

Step 6: Add an association
- Click the
Add associationbutton at the top of the page. - Configure a new association:
-
Zone: Select the Ronspot zone you wish to connect
-
Site: Choose the corresponding ACT365 site
-
Cardholder Group: Select the relevant ACT365 cardholder group
-
- Click
Completeto save the association. -
Repeat this process to add more zone associations as needed.

Step 7: Modify a zone in Ronspot
-
Go to
Spaces > Zones and maps. -
Select the zone you want to update and click the zone name or the pencil icon to edit it.
Step 8: Enable access control check-in
-
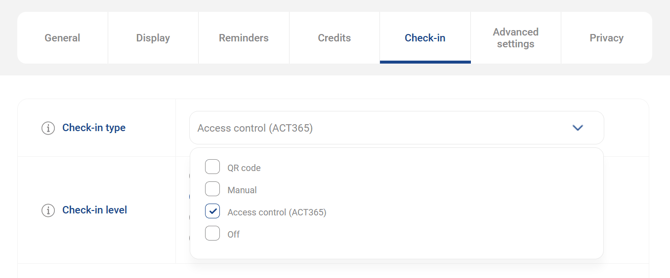
Go to the
Check-intab. -
For the Check-in type, select
Access control (ACT365). -
Click
Update.
Step 9: Apply to additional zones
-
Repeat Steps 7 and 8 for any other zones that should receive check-in logs.
-
Note: This option is only available for zones configured in Step 6.
If you need further help, please reach out at support@ronspotflexwork.com