Step 1: Login to the Ronspot admin portal
- Open your web browser and navigate to the Ronspot admin portal.
- Enter your credentials to log in.

Step 2: Go to ‘Users > Login methods’
-
In the sidebar menu, go to
Users > Login methods.
Step 3: Click on the ‘Microsoft Entra ID’ icon
-
Find your domain name in the list displayed.
-
Click on the Microsoft logo in the Microsoft Entra ID column next to your domain name.

If your domain name isn’t listed, enter it in the field above the table and click Add domain to include it.
Step 4: Switch to ‘Active’ and save
-
Set the configuration as follows:
-
Apply to: Select
EmployeesorEmployees and Administrators
-
-
-
-
This setting determines who Microsoft SSO will apply to app.ronspotflexwork.com and/or admin.ronspot.ie
-
-
-
-
- Enabling it for the Employees page is required for Steps 11 and 12.
-
Status: Toggle the switch from
Inactive(grey) toActive(blue).
-
-
Click on the
Savebutton at the bottom of the page.

Step 5: Login to the Azure portal
- Open your web browser and navigate to the Azure portal.
- Enter your credentials to log in.

Step 6: Go to ‘Manage Microsoft Entra ID’
-
In the Azure homepage, locate the
Manage Microsoft Entra IDsection. -
Click on the
Viewbutton under Manage Microsoft Entra ID.

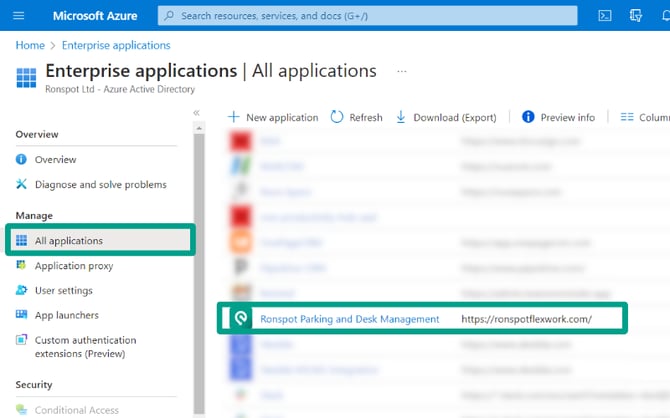
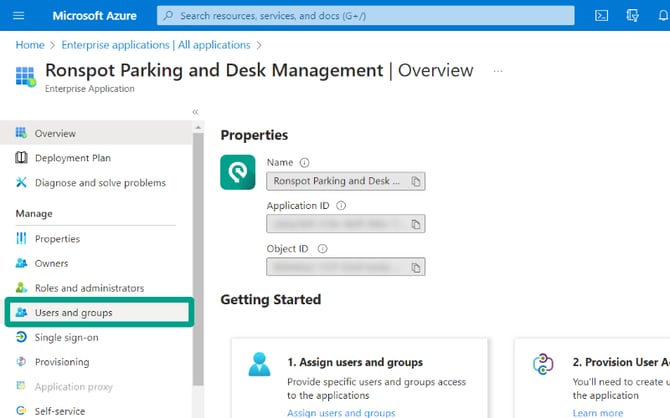
Step 7: Go to ‘Enterprise applications’
-
In the left-hand sidebar, click on
Enterprise applications. -
This will bring you to your company's overview page.

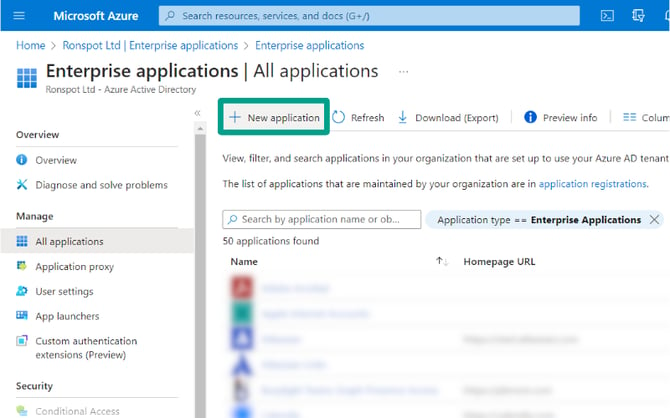
Step 8: Add a ‘New application’
-
At the top of the Enterprise Applications page, click on the
+ New applicationbutton.
Step 9: Find the Ronspot app in the Azure AD Gallery
-
In the Azure AD Gallery, type
Ronspotin the search bar. -
Click on the app named
Ronspot Parking and Desk Management.

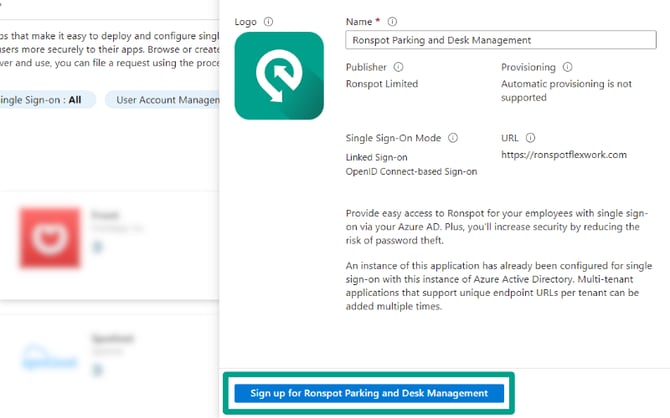
Step 10: Sign up for the Ronspot application
-
A pop-up will appear on the right side of the page.
-
Click on the blue button
Sign up for Ronspot Parking and Desk Management.
Step 11: Log in to the Ronspot employee app
-
You will be automatically redirected to Ronspot web login page.
-
Enter your Azure global admin email address.
⚠️ Important: You must use the exact same email address associated with your Global Admin role in Azure. Using a different email address will prevent the permissions screen from appearing in the next step, which is required to complete the setup.
-
Tick the checkbox to accept the Terms and Conditions, then click
Confirm. -
On the next screen, select
Continue with Microsoftto log in.

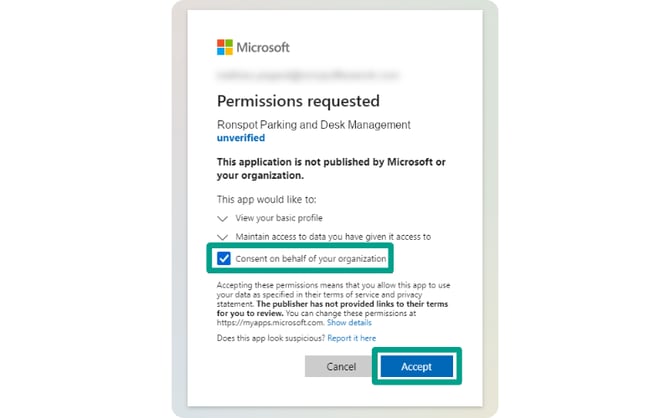
Step 12: Give permissions
-
On the Microsoft permissions page, if prompted, tick the option
Consent on behalf of your organization. -
Then click on the
Acceptbutton.
Step 13: Go to ‘Users and groups’
- Return to the Azure portal
- In the left-hand sidebar, click on
Users and groups.
Step 14: Click on ‘Add user/group’
-
On the Users and groups page, you will see a list of employees who have been granted access to Ronspot via Azure AD.
-
To add a new employee, click on the
Add user/groupbutton at the top of the list.
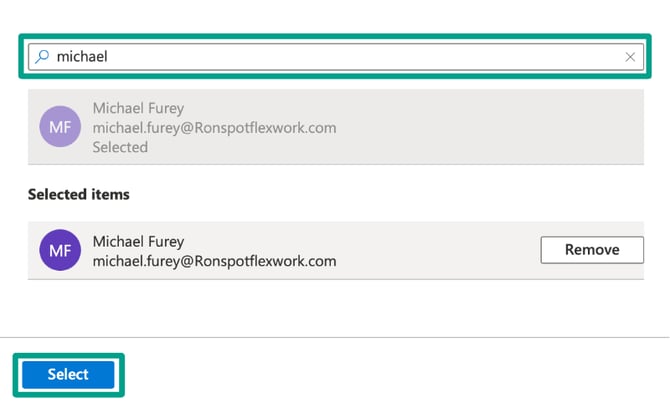
Step 15: Add new users
-
In the search box, type the name of the user you want to add.
-
Select the corresponding user from the search results.
-
Click on the
Selectbutton.
Conclusion
You have now successfully connected Microsoft Entra ID to Ronspot. This integration allows your users to access Ronspot using their Microsoft Entra credentials, streamlining the process and enhancing security.
Property Mapping: If you wish to map Microsoft Identity Property to Ronspot Property, please refer to this article.
If you encounter any issues during the setup, refer to the documentation provided by Microsoft or Ronspot, or contact support for further assistance.