Step 1: Edit a space
- Log in to the Ronspot admin panel
-
To edit a space from the map view:
- Go to Insights > Live View.
- Click on a space on the map and select Edit Space.

-
Alternatively, you can edit a space from the Spaces menu:
- Go to Spaces and select Parking Spaces, Desks, or Meeting Rooms, depending on the type of space you want to edit.
- Find the relevant space in the list.
- Click the space name or the edit icon in the Actions column.
Step 2: Change the space status
Under Status, change the value fromActive to one of the following:
Inactive (permanent): this will make the space permanently inactive.Inactive (temporary): this will make the space inactive only for the selected dates.

Step 3: Configure the inactivity dates
- If you selected
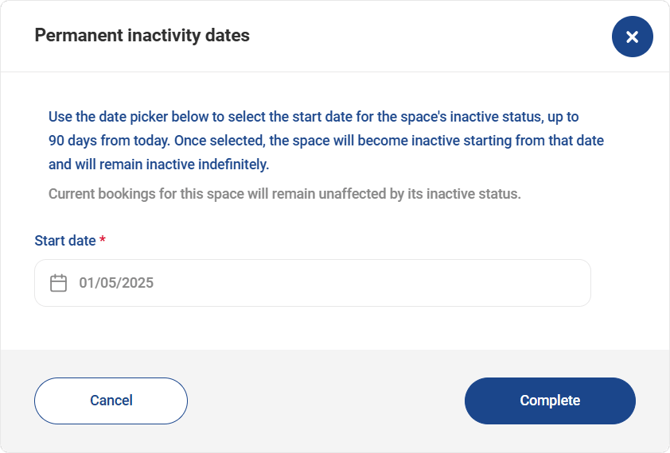
Inactive (permanent)in the previous step, the inactivity period will start by default on today’s date. If you want the permanent inactivity period to start at a later date:- Click on the
Configurebutton. - In the popup window that appears, select the desired
Start Dateusing the date picker. - Click
Completeto apply the new start date.
- Click on the
- If you selected
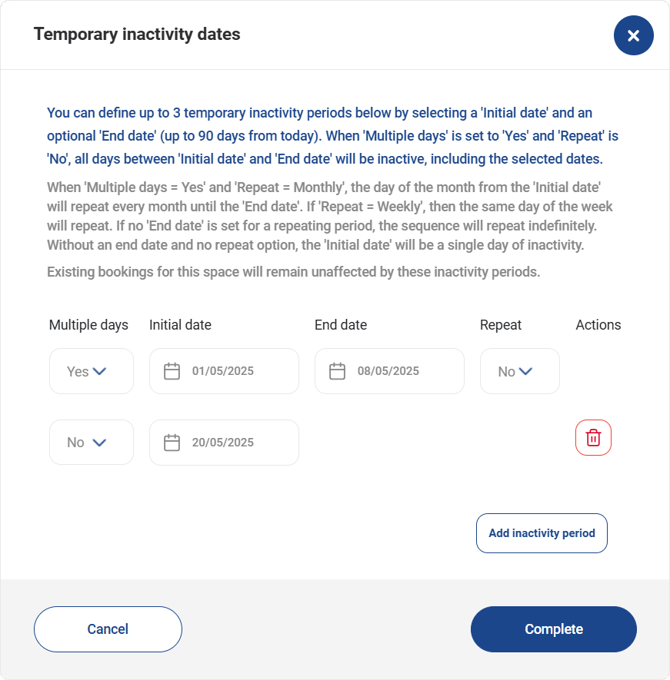
Inactive (temporary), click on theConfigurebutton to set the inactivity period, and set up the following fields:- Multiple days:
- Select
Noif you wish to make the space inactive for one day only. - Select
Yesto make it inactive for several days.
- Select
- Initial date:
- Select the start date of the inactivity period.
- End date (if “Multiple days” is selected):
- Select the end date of the inactivity period.
- Leave this field empty if you want the inactivity period to continue indefinitely.
- Repeat (if “Multiple days” is selected):
- Select
Noif you don’t want any recurrence pattern. - Select
Weeklyto make the space inactive every week on the same day as the initial date (e.g., every Monday). - Select
Monthlyto make the space inactive every month on the same date as the initial date (e.g., the 10th of every month).
- Select
- To add more inactivity periods:
- Click on the
Add periodbutton. - You can add up to 3 inactivity periods per space.
- Click on the
- Click
Completeonce you have finished configuring the period
- Multiple days:
Step 5: Save your changes
After configuring the status, click on theUpdate button at the bottom of the page to save the settings.By following these steps, you can easily manage the availability of your spaces in Ronspot, ensuring that they are active or inactive as needed, whether on a permanent or temporary basis.