
This article explains how Ronspot admins can add a vehicle and number plate to an employee's profile from the admin panel. Follow the steps below to complete the setup.
Step 1: Navigate to 'Employees'- Log in to the Ronspot admin panel.
- Navigate to
Users > Employees.
Step 2: Locate the Employee
- Use the search bar or scroll through the list to find the employee you want to update.
Step 3: Add a number plate
- In the 'Number Plate' column, click the pencil icon.
- A new pop-up window will open.
Step 4: Complete the following fields
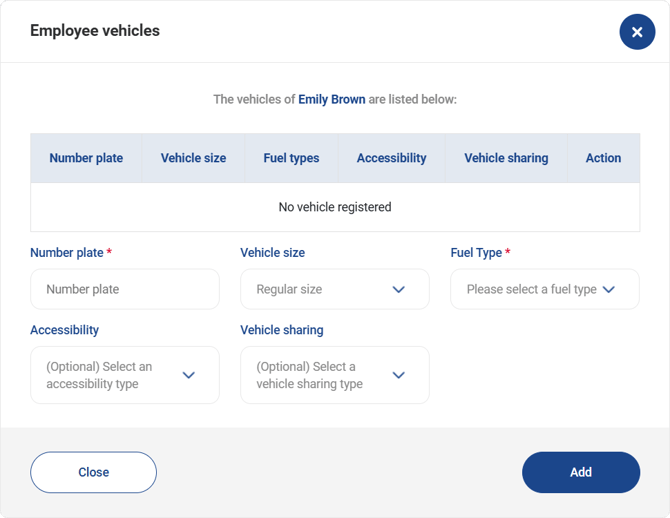
Number plate: Enter the vehicle's registration number.- Whitespace and hyphens are not accepted
Vehicle size: Select the size of the vehicle- If unsure, select 'Regular.' The employee can update the settings later from their profile.
Fuel type: Choose the type of fuel the vehicle uses- If unsure, select 'Petrol'. The employee can update the settings later from their profile.
Accessibility: Indicate if the vehicle requires access to disabled parking spots.- Leave empty if not applicable.
Vehicle sharing: Specify if the vehicle is a company car, part of a car pool, or available for car sharing.- Leave empty if not applicable.
Step 5: Save the configuration
- Click
Addto save the vehicle information.
Notes:
- This article is for admin users. For instructions on adding a vehicle through the app, refer to the employee-facing article on adding a vehicle
- To remove a vehicle, follow the same steps to open the vehicle details pop-up. In the pop-up, locate the vehicle you wish to remove and click the red bin icon.